There’s something about chicken popcorn that takes me straight back to childhood snacks—those crispy, bite-sized pieces that promise a punch of flavor with every crunch. Making it at home turns that nostalgic rush into something a bit more special, with control over seasoning and crunch level. It’s not just junk food; it’s a homemade version that’s crispy, juicy, and honestly, pretty addictive.
This recipe is about achieving that perfect balance—crunchy coating, tender chicken inside—without the greasy fast-food feel. I’ve tinkered with my own spice blends and coating techniques, and now I get to enjoy that familiar crunch anytime I want, but with a bit more love and a lot less mystery. It’s perfect for casual dinners, game nights, or just when you need a quick, satisfying snack that hits all the right notes.
Focusing on the nostalgic appeal of childhood snacks, but elevating chicken popcorn with a homemade, crispy coating that rivals fast-food quality. It’s about capturing that perfect crunch and juicy bite, reminding us of simpler times, yet perfect for any weeknight dinner or casual get-together.
Nostalgic Crunch
- Nothing beats the smell of crispy chicken filling the kitchen, it’s like a warm hug from childhood.
- Getting that perfect crunch is chaos—sometimes the coating sticks, sometimes it falls apart, but it’s always worth the mess.
- I feel proud when I manage to get the chicken juicy inside while staying crispy outside—it’s a small victory every time.
- There’s relief in knowing I can whip this up quickly for unexpected guests or a last-minute snack craving.
The story behind this recipe
- I first came across chicken popcorn at a small roadside stall during a road trip. The crunch of the coating and the juicy bites kept calling me back, long after the trip ended. It became a craving I couldn’t shake, so I started experimenting at home, trying to recreate that perfect bite without the greasy mess of fast food.
- Every attempt felt like a small victory—getting that crispy coating to stick just right, keeping the chicken tender inside. It’s become a little ritual, a way to bring back those carefree moments when snack time was pure joy. Now, I keep this recipe close, a quick fix to satisfy that nostalgic craving or to impress friends with something unexpectedly fun.
- heading: “The story behind this recipe”
Trivia and Origins of Chicken Popcorn
- Chicken popcorn gained popularity in American fast-food chains in the early 2000s, inspired by Asian-style popcorn chicken.
- Its bite-sized pieces and crispy coating make it a favorite for finger foods and street snacks across Asia and North America.
- Many home cooks have adapted it from street vendors, turning it into a customizable snack with different spice blends and coatings.
Ingredient breakdown
- Chicken breast: I prefer skinless, boneless breasts—they stay juicy and cook evenly, offering that tender bite you want. If yours is a little thick, pounding it flat helps it crisp up faster and more uniformly.
- Cornstarch: This is my secret for that extra crunch—gives the coating a light, crispy shell that crackles when you bite in. Swap with potato starch if you want an even lighter crunch, but expect a slightly different texture.
- Egg wash: Whisked eggs help the coating stick like glue, making each bite satisfyingly crisp and cohesive. For a dairy-free version, try a splash of coconut milk—it won’t bind quite as tightly but still adds flavor.
- Breadcrumbs: I use panko for that airy crunch, but regular fine breadcrumbs work in a pinch. Toast them lightly first for a richer flavor and a deeper golden color.
- Seasonings: Salt, pepper, garlic powder—simple but essential. A pinch of smoked paprika adds a smoky depth, but go wild with your favorite spices if you like a kick. Fresh herbs can brighten it up too.
- Oil for frying: Use vegetable or peanut oil—high smoke point and neutral flavor. Keep it at 180°C (356°F) for perfect crispiness. If your oil smokes, lower the heat a bit; it means it’s too hot.
- Optional hot sauce or honey: Tossed in after frying, these add a glossy finish and an extra flavor punch. Use sparingly; they can overpower the chicken’s natural flavor if overdone.
Spotlight on key ingredients
Chicken breast:
- I prefer skinless, boneless breasts—they stay juicy and cook evenly, offering that tender bite you want. If yours is a little thick, pounding it flat helps it crisp up faster and more uniformly.
- Cornstarch: This is my secret for that extra crunch—gives the coating a light, crispy shell that crackles when you bite in. Swap with potato starch if you want an even lighter crunch, but expect a slightly different texture.
Breadcrumbs:
- Cornstarch: This is my secret for that extra crunch—gives the coating a light, crispy shell that crackles when you bite in. Swap with potato starch if you want an even lighter crunch, but expect a slightly different texture.
- I use panko for that airy crunch, but regular fine breadcrumbs work in a pinch. Toast them lightly first for a richer flavor and a deeper golden color.
Notes for ingredient swaps
- Dairy-Free: Swap milk or buttermilk with almond or soy milk; it won’t change the flavor much but may affect how the coating adheres.
- Gluten-Free: Use gluten-free panko or crushed rice crackers instead of regular breadcrumbs for a crisp, allergy-friendly crunch.
- Low-Sodium: Reduce salt in the coating or skip adding extra salt altogether; the seasoning will be milder but still tasty.
- Spicy Kick: Incorporate cayenne pepper or hot paprika into the coating for a fiery twist that keeps the heat front and center.
- Sweet Finish: Toss fried chicken in honey or maple syrup for a sticky, sweet glaze that complements the savory crunch.
- Oil Choice: Use avocado oil for a milder flavor and higher smoke point, especially if you like to fry at higher temps.
- Herb Variations: Add finely chopped fresh herbs like thyme or cilantro into the coating for a fresh, aromatic lift.
Equipment & Tools
- Sharp knife: Cut chicken into uniform pieces for even cooking.
- Mixing bowls: Hold coatings and egg wash separately.
- Deep-fry thermometer: Monitor oil temperature precisely.
- Slotted spoon: Remove chicken from hot oil safely.
- Paper towels: Drain excess oil and keep chicken crispy.
Step-by-step guide to chicken popcorn
- Equipment & Tools: Use a sharp knife for even chicken cut, a mixing bowl for coating, a deep-fry thermometer to monitor oil temperature, and a slotted spoon for frying. A baking sheet lined with paper towels helps drain excess oil.
- Cut chicken breasts into small, bite-sized pieces—about 2 cm or ¾ inch. Pat dry with paper towels to remove excess moisture, ensuring crisp coating.
- Prepare the coating mixture: In a bowl, whisk together 1 cup cornstarch, 1 teaspoon garlic powder, ½ teaspoon smoked paprika, ½ teaspoon salt, and freshly ground pepper to taste.
- In a separate bowl, beat 2 large eggs until frothy. This will help the coating stick evenly.
- Dip each chicken piece into the egg wash, then dredge thoroughly in the cornstarch mixture, pressing gently to adhere well. Repeat if you want extra crunch.
- Heat about 5 cm (2 inches) of vegetable or peanut oil in a deep pan or wok to 180°C (356°F). Use the thermometer for accuracy; the oil should shimmer but not smoke.
- Step 6a: Carefully add chicken pieces in batches, avoiding overcrowding—fry for 3-4 minutes each batch. They should turn golden and crispy.
- Step 6b: Stir gently during frying to ensure even browning. Listen for a consistent crackling sound, indicating proper frying temperature.
- Step 6c: If the coating browns too quickly, lower the heat slightly; if it’s not crackling, the oil isn’t hot enough. Adjust accordingly.
- Use a slotted spoon to remove the chicken and transfer to the prepared paper towel-lined tray. Rest for 2 minutes before serving for maximum crispness.
- Finishing & Plating: Toss hot chicken popcorn with a drizzle of honey or hot sauce if desired. Serve immediately on a warm platter with dipping sauces.
Allow the chicken to rest for 2 minutes on paper towels, then toss with optional glaze or serve immediately with dipping sauces for maximum crunch and flavor.
How to Know It’s Done
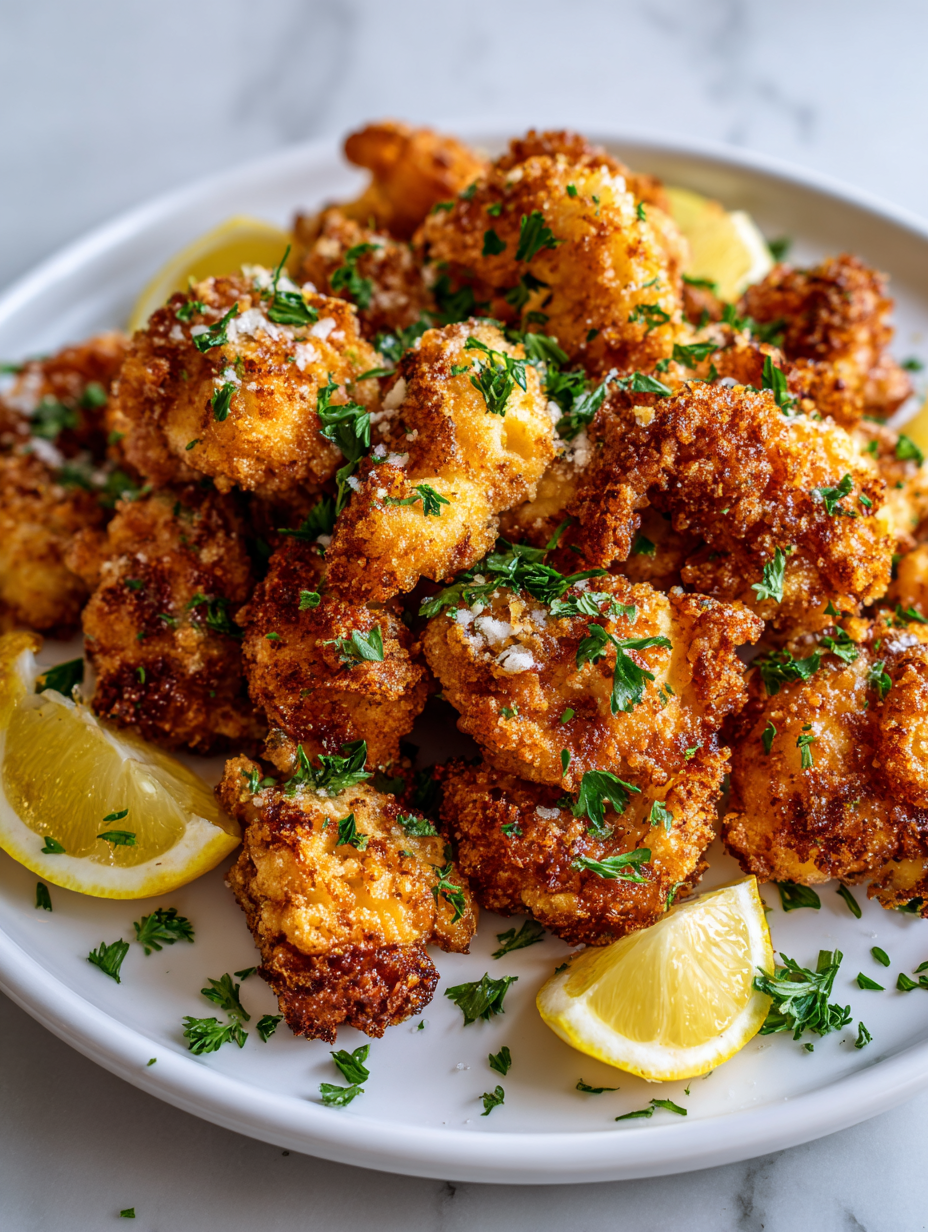
- Color: Golden-brown coating with an even crisp exterior.
- Texture: Chicken inside should be juicy, coating crispy, not soggy or greasy.
- Appearance: Bubbles diminishing in oil indicate proper frying temperature and doneness.
Homemade Chicken Popcorn
Ingredients
Equipment
Method
- Start by cutting the chicken breasts into small, uniform bite-sized pieces about 2 cm (¾ inch) each. Pat them dry with paper towels to remove excess moisture, which helps achieve a crisp coating.
- In a mixing bowl, combine the cornstarch, garlic powder, smoked paprika, and salt. Mix well to evenly distribute the seasonings.
- In a separate bowl, whisk the eggs until frothy and slightly bubbly. This will help the coating stick to the chicken.
- Dip each chicken piece into the beaten eggs, making sure it's fully coated. Then, dredge it thoroughly in the seasoned cornstarch mixture, pressing gently so the coating adheres well. Repeat this process for an extra crispy layer if desired.
- Pour enough oil into a deep pan or wok to reach about 5 cm (2 inches) deep. Attach a deep-fry thermometer and heat the oil to exactly 180°C (356°F). The oil should shimmer and give off a gentle bubbling sound.
- Carefully add the coated chicken pieces in small batches to the hot oil, avoiding overcrowding. Fry each batch for 3-4 minutes, turning gently with a slotted spoon, until they turn golden brown and crispy all over.
- Use a slotted spoon to remove the cooked chicken from the oil and transfer it to a paper towel-lined tray to drain excess oil. Rest for about 2 minutes to enhance crispiness.
- Repeat the frying process with remaining chicken pieces. Keep the cooked chicken warm if serving immediately, or reheat briefly in a hot oven for extra crispness.
- Serve hot, optionally tossing with a drizzle of honey or hot sauce for added flavor. Enjoy the crispy, juicy bites that remind you of childhood snacks!
Pro tips for crispy chicken popcorn
- Bolded mini-head: Use cold oil for frying → Keeps the chicken crispy and prevents greasy coating.
- Bolded mini-head: Maintain consistent oil temperature → Use a thermometer to keep it at 180°C (356°F) for perfect crunch.
- Bolded mini-head: Don’t overcrowd the pan → Fry in small batches to avoid temperature drops and soggy coating.
- Bolded mini-head: Shake off excess coating → Gently tap each piece to prevent clumping and uneven frying.
- Bolded mini-head: Rest fried chicken briefly → Drain on paper towels and let sit 2 minutes for maximum crispness.
- Bolded mini-head: Add a splash of hot sauce post-fry → For a glossy, spicy glaze that sticks without sogginess.
- Bolded mini-head: Double coat for extra crunch → Dip in egg, coat in seasoned cornstarch, then repeat before frying.
Common mistakes and how to fix them
- FORGOT to preheat oil → Ensure oil reaches 180°C (356°F) before frying.
- DUMPED chicken too quickly → Fry in small batches, don’t overcrowd the pan.
- OVER-TORCHED coating → Adjust heat if coating browns too fast, keep oil temperature steady.
- MISSED resting time → Rest fried chicken for 2 minutes to keep it crispy and juicy.
Quick fixes and pantry swaps
- When oil shimmers, add chicken quickly to avoid sticking and sogginess.
- Splash a little water if coating darkens too fast—lowers heat instantly.
- Patch soggy coating by re-frying briefly at higher temp for extra crunch.
- Shield burned coating by lowering heat immediately and removing from oil.
- Replace panko with crushed cornflakes for an extra crispy, slightly sweeter crunch.
Prep, store, and reheat tips
- Prep the chicken: Cut into bite-sized pieces and coat in seasoned cornstarch a day ahead; keep refrigerated for up to 24 hours. The crispy coating will stay light if kept dry and covered.
- Assembly: Dredge chicken in egg wash and coating just before frying for maximum crispiness. The coated chicken can sit in the fridge for up to 2 hours, but avoid long delays to prevent sogginess.
- Storage: Fried chicken popcorn can be kept in an airtight container in the fridge for up to 2 days. Expect the coating to soften slightly, but reheating helps restore some crunch.
- Reheating: Reheat in a hot oven at 200°C (390°F) for 5–7 minutes or until crispy and hot. For a quicker fix, reheat in a toaster oven or air fryer, watching for that crackling crunch to return.
Top questions about chicken popcorn
1. Can I use chicken thighs instead?
Use chicken breasts for juicy, tender bites. Thinner pounded pieces crisp up faster and cook evenly.
2. What temperature should I fry the chicken at?
Fry at 180°C (356°F). If the coating browns too quickly, lower the heat slightly to keep it crispy without burning.
3. Can I bake instead of fry?
Yes, you can bake the coated chicken at 200°C (390°F) for about 15-20 minutes, flipping halfway, until golden and cooked through.
4. What kind of breadcrumbs should I use?
Use panko breadcrumbs for the lightest crunch. Regular breadcrumbs work too but may be less airy and crispy.
5. How do I know when the oil is hot enough?
Ensure the oil is hot enough before adding chicken; otherwise, the coating absorbs more oil and becomes soggy.
6. Can I add sauce after frying?
Yes, toss the fried chicken in honey or hot sauce after frying for added flavor and a sticky, glossy finish.
7. How should I store leftover chicken popcorn?
Keep fried chicken on a wire rack or paper towels to drain excess oil, preserving crispness.
8. How do I reheat chicken popcorn?
Reheat in a hot oven or air fryer at 200°C (390°F) for 5-7 minutes until crispy. Avoid microwave, which makes it soggy.
9. Can I customize the spices?
Adjust spices in the coating to your taste—add more garlic powder, smoked paprika, or even a dash of cayenne.
10. Can I skip the egg wash?
Yes, you can skip the egg wash or substitute with cornstarch slurry for a different coating adhesion, but expect slight texture changes.
Cooking this chicken popcorn feels like a small act of rebellion—crunching through that golden shell, juicy inside, it’s a reminder that simple pleasures are worth fussing over. It’s not just about nostalgia; it’s about making a snack that feels indulgent but is totally doable at home.
Whenever I make this, I think about how a tiny bit of effort turns into something memorable. It’s perfect for those lazy weekends or unexpected guests craving a treat that’s crispy, flavorful, and just a little messy—in the best way.

Hi, I’m Michael Anderson, the voice behind Overreacting To Salt. Yes, the name usually gets a laugh. And no, I am not actually afraid of salt. In fact, understanding salt and flavor balance is what inspired this entire blog.
 The voice behind Overreacting To Salt. Yes, the name usually gets a laugh. And no, I am not actually afraid of salt. In fact, understanding salt and flavor balance is what inspired this entire blog.
Overreacting To Salt is my space to talk honestly about cooking mistakes, kitchen wins, and the small details that make a big difference in flavor. I created it for home cooks who want to understand food better without feeling intimidated.
The voice behind Overreacting To Salt. Yes, the name usually gets a laugh. And no, I am not actually afraid of salt. In fact, understanding salt and flavor balance is what inspired this entire blog.
Overreacting To Salt is my space to talk honestly about cooking mistakes, kitchen wins, and the small details that make a big difference in flavor. I created it for home cooks who want to understand food better without feeling intimidated.


