Homemade chicken nuggets are one of those things that seem simple but can easily go wrong if you’re not paying attention. I’ve spent years trying to perfect that perfect crunch—something crispy and golden that’s not greasy or soggy. It’s a constant experiment in balancing seasoning, breading, and oil temperature, but once you get it right, it’s like rediscovering a childhood favorite with much more satisfaction.
What I love about making these at home is the control. No weird preservatives, no mysterious additives—just real chicken, fresh spices, and a crispy coating that sticks without turning into a greasy mess. Plus, you can customize the seasoning to suit your mood—more spice, less salt, a hint of lemon zest, or even a dash of smoked paprika for depth.
It’s honestly a messy process, but that’s part of the charm. The smell of sizzling chicken and the crackle of breading during frying? That’s pure comfort. These nuggets turn out better than any fast food version I’ve had, and I’ve learned that patience and steady oil temp are the secrets. Once you get the hang of it, it’s a kitchen ritual I look forward to.
Focusing on making homemade chicken nuggets with a crisp, golden crust that rivals fast food, but with the control over ingredients and seasoning—turning a simple snack into a satisfying, customizable treat.
Rediscovering Joy in Homemade Nuggets
- Making chicken nuggets at home feels like reclaiming a childhood joy, but with grown-up flavors and crisp textures.
- Nothing beats the smell of seasoned chicken frying—it’s chaos and comfort all at once, reminding me of weekend kitchens with family.
- Getting that perfect crunch took me years, but now it’s a tiny proud moment every time I nail the oil temperature and breading balance.
- I get a weird thrill from customizing my nuggets—more spice, less salt, adding a squeeze of lemon—I feel like a flavor scientist.
- There’s a strange relief in knowing exactly what’s inside these nuggets—no mystery ingredients, just honest, crispy chicken.
The story behind this recipe
- Making chicken nuggets from scratch was born out of frustration—those store-bought ones often have a weird texture or too many preservatives. One day, I just decided to experiment with what I had in the fridge, aiming for that tender chicken inside and crispy crust outside that actually held up. The first batch was a mess—oil splatters everywhere and some nuggets turned out too greasy or undercooked—but I learned a lot about heat control and breading technique along the way.
- Over time, I found that balancing the seasoning and keeping the oil at just the right temp made all the difference. Now, I get a little pride when I see that golden, crackly crust and taste that perfect bite—juicy chicken with a satisfying crunch. It’s become a bit of a kitchen ritual, and honestly, it’s one of the most forgiving recipes when you get the basics right—just patience and a watchful eye.
- heading: ‘The story behind this recipe’
Trivia and origins of chicken nuggets
- Chicken nuggets originated in the United States in the 1950s, quickly becoming a fast food staple.
- The term ‘nugget’ was first used in the 1950s to describe small, bite-sized pieces of chicken.
- Early recipes involved grinding chicken and breading it, but modern versions often use whole chicken breast for texture.
- Fast food chains popularized the crispy breading, but homemade versions often use panko for extra crunch.
- Nuggets have become a cultural icon, inspiring countless homemade recipes and even gourmet variations.
Component Breakdown
- Chicken breast: I prefer skinless, boneless breast—lean and tender, it crisps up beautifully. Swap with thigh if you want more juiciness, but be aware it may be a bit greasier.
- Flour: I use all-purpose flour for the coating—light, neutral, and crispy. For gluten-free, rice or almond flour works but gives a slightly different crunch.
- Eggs: Whisked eggs help the breading stick. If you’re out, a splash of milk with a pinch of cornstarch can do the trick—just keep the coating moist.
- Panko breadcrumbs: I love their airy crunch—look for the coarser kind for extra texture. For a denser crust, mix in crushed cornflakes or regular breadcrumbs.
- Seasonings: Salt, pepper, garlic powder—simple but essential. I sometimes add smoked paprika or cayenne for a smoky or spicy kick. Smell that to gauge flavor—bright and inviting!
- Oil: Use vegetable or canola oil, about 180°C (355°F). Keep an eye on the temperature—if it drops, nuggets get greasy; if it rises too high, they might burn fast.
- Lemon zest (optional): Adds a zing—brightens up the flavor. If you skip it, just a squeeze of lemon after frying lifts the whole batch.
Spotlight on key ingredients
Chicken breast:
- I prefer skinless, boneless breast—lean and tender, it crisps up beautifully. Swap with thigh if you want more juiciness, but be aware it may be a bit greasier.
- Panko breadcrumbs: I love their airy crunch—look for the coarser kind for extra texture. For a denser crust, mix in crushed cornflakes or regular breadcrumbs.
Eggs and Oil:
- Oil: Use vegetable or canola oil, about 180°C (355°F). Keep an eye on the temperature—if it drops, nuggets get greasy; if it rises too high, they might burn fast.
- Eggs: Whisked eggs help the breading stick. If you’re out, a splash of milk with a pinch of cornstarch can do the trick—just keep the coating moist.
Notes for ingredient swaps
- Chicken: I use skinless, boneless breast—lean and tender. Swap with thigh for more juiciness, but expect a slightly greasier bite.
- Flour: All-purpose works best for a light, crispy coating. For gluten-free, try rice or almond flour—just note the texture will differ slightly.
- Eggs: Whisked eggs help the breading stick. Out? Mix a splash of milk with a teaspoon of cornstarch as a substitute—keeps coating moist.
- Panko breadcrumbs: Coarse panko gives that airy crunch. For denser crust, mix in crushed cornflakes or regular breadcrumbs for extra texture.
- Seasonings: Salt, pepper, garlic powder are staples. Add smoked paprika or cayenne for smoky or spicy notes. Smell as you go—bright and inviting!
- Oil: Vegetable or canola oil at 180°C (355°F) is ideal. Use a thermometer—if it drops, nuggets may soak up oil; if too hot, they burn fast.
- Lemon zest: Adds a zing and freshness. If skipped, squeeze lemon over finished nuggets for a similar bright effect.
Equipment & Tools
- Deep skillet or heavy-bottomed pot: for safe, even frying at controlled temperature
- Thermometer: to monitor the oil temperature accurately
- Tongs: to turn and remove nuggets safely
- Wire rack: to drain excess oil and keep nuggets crispy
Step-by-step guide to chicken nuggets
- Gather your equipment: a deep skillet or heavy-bottomed pot, a thermometer, tongs, and a wire rack. Purpose: ensure even frying and proper temperature control.
- Prepare the chicken: cut breasts into uniform bite-sized pieces, about 2.5 cm (1 inch). Pat dry to help coating stick.
- Set up dredging stations: shallow bowls for flour, beaten eggs, and panko breadcrumbs mixed with seasonings. Purpose: assemble for easy breading process.
- Heat oil: fill your skillet with about 5 cm (2 inches) of oil. Heat over medium-high heat to 180°C (355°F). Use a thermometer to monitor temp.
- Bread the chicken: dip each piece into flour, then egg, then panko mixture. Press gently to adhere. Set aside on a tray.
- Fry in batches: carefully lower nuggets into hot oil, avoiding overcrowding. Fry for 3–4 minutes, turning often, until golden and crispy.
- Check for doneness: the coating should be deep golden, and chicken should jiggle slightly but feel firm. The internal temp should reach 75°C (165°F).
- Remove and drain: transfer nuggets to wire rack or paper towels. Rest for 2 minutes to settle and finish crisping.
- Final check: nuggets should be crispy, golden, and hot inside. No raw pink in the center. Serve immediately for maximum crunch.
Let nuggets rest on a wire rack for 2 minutes. Serve hot with your favorite dips. The resting allows the crust to firm up and juices to settle.
How to Know It’s Done
- Golden-brown crust with a crackly surface
- Internal temperature at 75°C (165°F)
- Nuggets feel firm and jiggle slightly when gently pressed
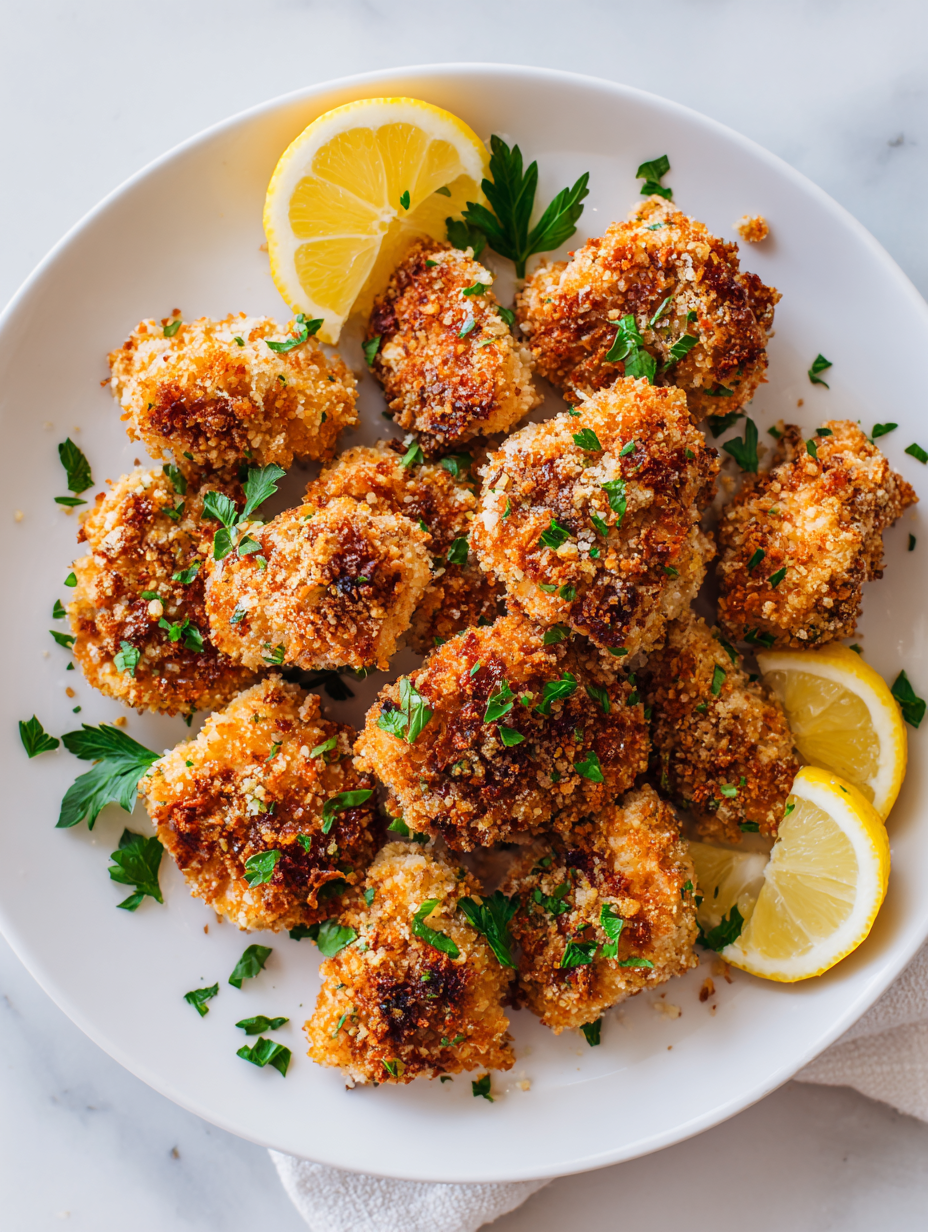
Homemade Crispy Chicken Nuggets
Ingredients
Equipment
Method
- Start by preparing your ingredients: cut the chicken breasts into uniform 2.5 cm (1 inch) pieces to ensure even cooking, and pat them dry with paper towels to help the coating stick better.
- Set up your dredging stations: place the flour in a shallow bowl, beat the eggs in another bowl, and mix the panko breadcrumbs with salt, pepper, garlic powder, and smoked paprika in a third bowl for seasoning and crunch.
- Pour vegetable oil into a deep skillet or heavy-bottomed pot, filling it about 5 cm (2 inches). Attach a thermometer and heat the oil over medium-high heat until it reaches 180°C (355°F). You'll see gentle ripples and a slight shimmer on the surface when it's ready.
- Dip each chicken piece into the flour, turning to coat evenly, then into the beaten eggs, letting any excess drip off, and finally press into the seasoned panko mixture, ensuring an even, thick coating that sticks well.
- Carefully lower a batch of coated chicken nuggets into the hot oil using tongs, making sure not to overcrowd the pan. Fry for about 3–4 minutes, gently turning occasionally, until they turn a deep golden brown and the coating is crispy and crackling.
- Use tongs to remove the nuggets from the oil and transfer them to a wire rack set over paper towels to drain excess oil. Rest for 2 minutes; this helps the crust set and stay crispy.
- Repeat the frying process in batches until all chicken pieces are cooked, maintaining the oil temperature around 180°C (355°F) for consistent crispness.
- Once finished, serve the nuggets hot with your favorite dips. The crispy exterior and juicy inside make for a satisfying, homemade snack or main course.
Notes
Pro tips for perfect chicken nuggets
- Proper oil temperature: Use a thermometer to keep oil at 180°C (355°F) for crispy, non-greasy nuggets.
- Even breading: Dredge quickly and press breadcrumbs gently onto chicken for a uniform, crunchy crust.
- Batch frying: Fry in small batches to maintain temperature and avoid soggy, greasy nuggets.
- Rest after frying: Let nuggets rest on a wire rack for 2 minutes to set the crust and prevent sogginess.
- Season breadcrumbs: Mix seasonings into breadcrumbs for even flavor distribution and a more flavorful crust.
- Check for doneness: Internal temp should hit 75°C (165°F) and coating should be deep golden for perfect crispness.
- Use coarse panko: Coarser breadcrumbs create a crunchier texture that holds up better during frying.
Common mistakes and how to fix them
- FORGOT to check oil temperature → Use a thermometer to prevent greasy nuggets.
- DUMPED too many nuggets at once → Fry in batches for even cooking and crispness.
- OVER-TORCHED the coating → Keep an eye on color and adjust heat to avoid burning.
- MISSED resting time → Rest on a wire rack for maximum crunch and less sogginess.
Quick fixes and pantry swaps
- When oil shimmers, splash a tiny bit of water—if it crackles, you’re ready.
- If nuggets are soggy, increase heat slightly and fry in smaller batches.
- Splash a few drops of vinegar into oil if it smokes—rescue with fresh oil.
- Patch greasy spots by blotting with paper towels immediately after frying.
- Shield nuggets from uneven heat by rotating them gently during frying.
Prep, store, and reheat tips
- Prepare the chicken and breading stations ahead of time; chicken cut into pieces and breading mixture ready, so you can jump straight to frying. The raw chicken can be stored in the fridge for up to 24 hours without issue.
- You can bread the chicken pieces a few hours in advance, keeping them covered and refrigerated. The coated nuggets stay crispier if fried fresh, but they can be kept in an airtight container in the fridge for up to 24 hours and still hold some crunch.
- Cooked nuggets are best enjoyed fresh, but leftovers can be stored in an airtight container in the fridge for up to 2 days. Reheat in the oven at 180°C (355°F) for about 10 minutes until crispy—listen for that satisfying crackle.
- Freezing cooked or uncooked nuggets is an option. Freeze in a single layer on a baking sheet, then transfer to a bag. They keep well for up to 1 month. Reheat directly from frozen in the oven or air fryer, adding a few extra minutes for crispiness. Expect slightly less crisp on reheating, but still tasty.
Top questions about chicken nuggets
1. Can I use chicken thighs instead of breasts?
Use chicken breast for the best tender and crispy results. Thighs add juiciness but can be greasier.
2. Can I bake the chicken nuggets instead of frying?
Yes, you can bake the nuggets at 200°C (400°F) for about 20 minutes, flipping halfway, for a healthier version.
3. How do I know when the oil is ready?
Ensure the oil is hot enough—about 180°C (355°F)—so the coating crisps up without absorbing too much oil.
4. My nuggets aren’t sticking together, what’s wrong?
If the coating isn’t sticking well, make sure the chicken is dry and the flour and eggs are properly prepared.
5. What type of breadcrumbs work best?
Use panko breadcrumbs for extra crunch and a light, airy coating that stays crispy longer.
6. How many nuggets should I fry at once?
Fry in small batches to keep the oil temperature steady and prevent sogginess.
7. How can I tell if my nuggets are fully cooked?
Cook until the nuggets are deep golden and the internal temperature reaches 75°C (165°F) for safety.
8. How should I reheat leftover nuggets?
Reheat leftovers in the oven at 180°C (355°F) for about 10 minutes until crispy again.
9. Can I add different seasonings?
Adding a pinch of smoked paprika or cayenne can give a smoky or spicy boost to the flavor.
10. What oil is best for frying chicken nuggets?
Use vegetable or canola oil for a neutral flavor and high smoking point, perfect for frying.
Making chicken nuggets at home isn’t just about the crispy, golden crust—it’s about reclaiming a simple pleasure with your own hands. The process might be messy, but the smell of frying chicken and that satisfying crunch make it all worthwhile. Once you get the hang of controlling the heat and seasoning, it’s a small victory every time.
In the end, these nuggets aren’t just a snack—they’re a reminder that good things come from a little chaos in the kitchen. They’re perfect for a quick family dinner or a lazy weekend treat. And honestly, nothing beats biting into a homemade piece that’s juicy inside and crispy outside, hot and fresh from the pan.

Hi, I’m Michael Anderson, the voice behind Overreacting To Salt. Yes, the name usually gets a laugh. And no, I am not actually afraid of salt. In fact, understanding salt and flavor balance is what inspired this entire blog.
 The voice behind Overreacting To Salt. Yes, the name usually gets a laugh. And no, I am not actually afraid of salt. In fact, understanding salt and flavor balance is what inspired this entire blog.
Overreacting To Salt is my space to talk honestly about cooking mistakes, kitchen wins, and the small details that make a big difference in flavor. I created it for home cooks who want to understand food better without feeling intimidated.
The voice behind Overreacting To Salt. Yes, the name usually gets a laugh. And no, I am not actually afraid of salt. In fact, understanding salt and flavor balance is what inspired this entire blog.
Overreacting To Salt is my space to talk honestly about cooking mistakes, kitchen wins, and the small details that make a big difference in flavor. I created it for home cooks who want to understand food better without feeling intimidated.


