I’ve always loved the way mushrooms can be both humble and fancy, especially when you give them a little extra crunch. Toasted breadcrumbs on top aren’t just for texture—they bring a nutty, golden flavor that makes each bite feel special, even if it’s just a quick snack. It’s that subtle contrast that turns these baked stuffed mushrooms into something you want to keep coming back to.
What really keeps me coming back to this recipe is how simple ingredients come together with just a bit of patience and a careful hand. The smell of garlic and herbs mingling with the earthy mushroom caps, topped with that crispy breadcrumb crust—it’s like a little celebration for your senses. Plus, it’s one of those dishes that feels fancy enough for guests but easy enough for a weeknight dinner. No fuss, just good, honest cooking.
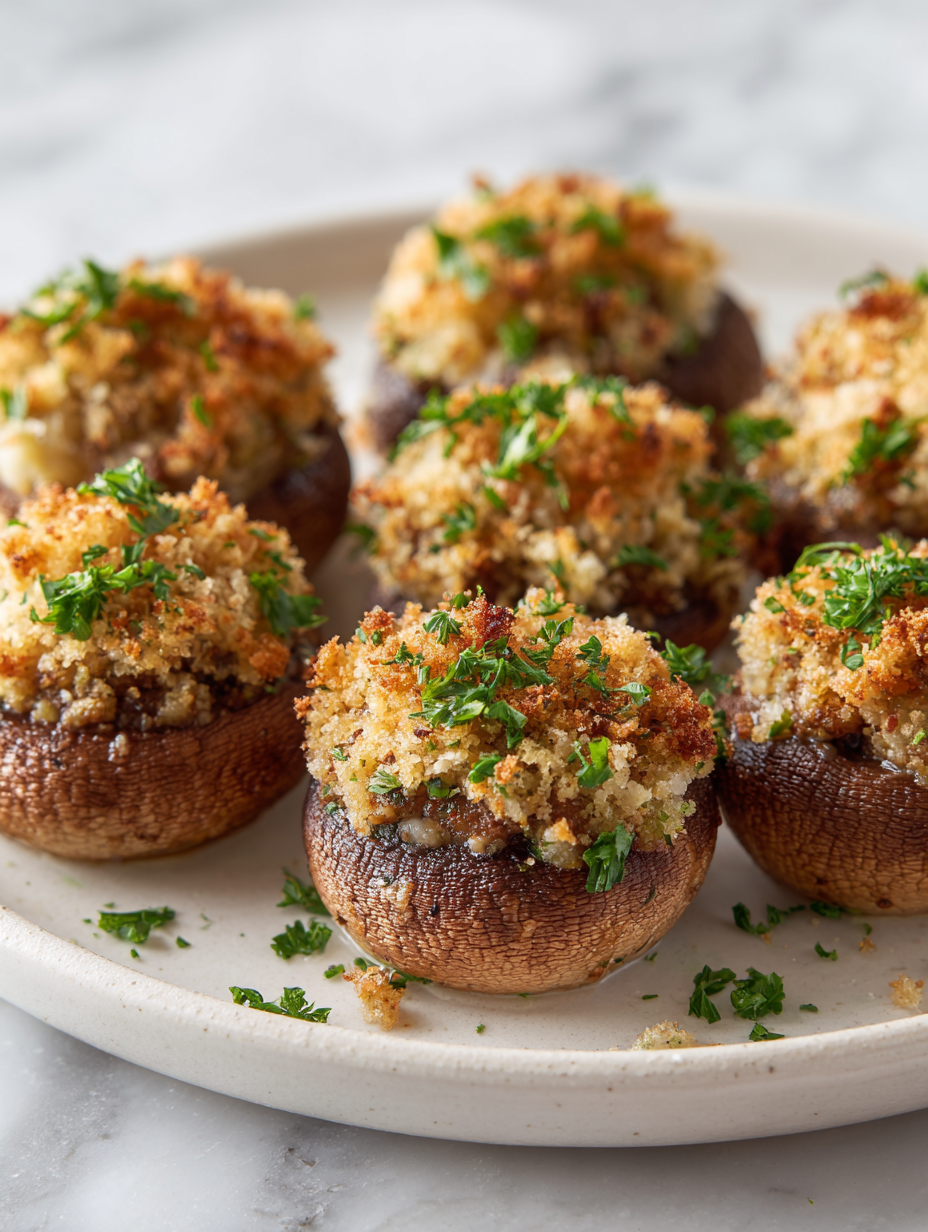
Focusing on the unexpected crunch of toasted breadcrumbs topping the mushrooms, highlighting how this simple addition transforms the texture and elevates the dish from just a side to a memorable bite.
The story behind this recipe
- This recipe is a nod to my grandmother’s kitchen, where she’d toss a handful of breadcrumbs onto everything for good measure. I remember sneaking bites of her stuffed mushrooms, the crispy topping contrasting perfectly with the tender, savory filling inside. It’s one of those dishes that feels both nostalgic and fresh, like a secret passed down through Sunday dinners.
- What keeps me coming back to this version is how it’s evolved in my own kitchen—less fancy, more forgiving. I love experimenting with different herbs or cheeses, but that crunch on top? It’s the soul of it. It’s a dish that’s humble yet memorable, perfect for any time I want a little comfort with a bit of crunch.
- heading: The story behind this recipe
Ingredient breakdown: key components
- Garlic: I love how minced garlic fills the kitchen with a warm, pungent aroma that wakes up the senses. If you prefer a milder garlic flavor, try roasting it first for a sweet, mellow twist.
- Cream cheese: It creates a rich, velvety filling that holds everything together—kind of like a cozy blanket for the mushrooms. Swap in ricotta if you want a lighter, fluffier texture, but don’t expect the same creamy punch.
- Breadcrumbs: I always toast mine until golden and crispy—they add that satisfying crunch on top. Use panko for extra lightness or crushed Ritz for a buttery note that melts into the filling if you’re feeling indulgent.
- Mushroom caps: The earthy smell as they bake is unbeatable, and I prefer medium-sized caps—they’re perfect for stuffing and easy to serve. For a firmer bite, choose larger caps, but avoid overly large ones that might collapse.
- Herbs (parsley & thyme): Fresh herbs brighten the dish with a grassy, lemon-bright note. If you only have dried, use half the amount to keep the flavor fresh rather than overpowering, and always chop finely to release their oils.
- Olive oil: A drizzle before baking gives the mushrooms a gentle sheen and helps the crumbs crisp up. If you’re out, a little melted butter works just as well, adding a richer, nuttier flavor.
- Lemon juice: A splash brightens the entire dish with a citrusy zing that cuts through the richness. Skip it if you prefer a more mellow, herb-forward flavor, but I find it really lifts the filling.
Spotlight on key ingredients
Breadcrumbs:
- Mushroom caps: I love how their earthy aroma intensifies as they bake, turning deeply savory and slightly smoky. Larger caps hold more filling and stay sturdy, but smaller ones are cuter and quicker to cook.
- I toast mine until golden and crisp, which adds a satisfying crunch and nutty flavor. Use panko for lightness or crushed Ritz for buttery richness—your call, but don’t skip this step for texture.
Garlic & Cream Cheese:
- Garlic: Minced garlic fills the kitchen with a warm, pungent aroma that wakes up the senses. Roasting it first softens its punch; raw adds sharpness, so choose based on your mood.
- Cream cheese: It melts into a velvety, rich filling that coats every bite. Substitute with ricotta for a lighter, fluffier vibe—just expect a slightly thinner filling that needs gentle handling.
Notes for ingredient swaps
- Dairy-Free: Swap cream cheese for blended silken tofu or cashew cheese—less creamy, but still rich and satisfying.
- Gluten-Free: Use crushed almonds or gluten-free panko instead of traditional breadcrumbs for crunch without gluten.
- Vegan: Replace cheese with nutritional yeast or vegan cheese; breadcrumbs with crushed cornflakes or gluten-free panko.
- Low-Sodium: Opt for no-salt-added breadcrumbs and use fresh herbs to keep flavor bright without excess salt.
- Herb Variations: Fresh basil, tarragon, or oregano can replace parsley and thyme—experiment for new flavor profiles.
- Oil Alternatives: Use avocado or sesame oil instead of olive oil—adds different aroma and nuttiness.
- Lemon Brightness: Lime juice can replace lemon for a slightly different citrus note, especially when serving with seafood.
Equipment & Tools
- Baking sheet: To hold and bake the mushrooms evenly.
- Small mixing bowl: To mix the filling ingredients.
- Spoon: For stuffing the mushroom caps.
- Skillet: To sauté the mushroom stems and aromatics.
- Knives and chopping board: To prepare and chop ingredients.
Step-by-step guide to baked stuffed mushrooms
- Preheat your oven to 190°C (375°F). Gather a baking sheet, a small mixing bowl, and a spoon. Lightly oil the baking sheet or line it with parchment paper for easy cleanup.
- Clean the mushroom caps gently with a damp cloth. Remove stems carefully, setting them aside for the filling. Brush the caps with a little olive oil and place them on the prepared baking sheet, gill side up. Bake for 10 minutes until just tender. This pre-cooking helps prevent sogginess.
- While mushrooms bake, finely chop the mushroom stems. In a skillet over medium heat, warm a tablespoon of olive oil. Add chopped stems and cook for 3-4 minutes until softened and fragrant. Add minced garlic, cook for another minute, until just golden.
- In a small bowl, combine cream cheese, grated Parmesan, chopped herbs, and a pinch of salt and pepper. Mix in the sautéed stems and garlic. Adjust seasoning to taste. The filling should be creamy but firm enough to scoop.
- Spoon the filling generously into each mushroom cap, pressing slightly to pack it in. Top with a sprinkle of breadcrumbs, pressing lightly to help them stick. For extra crunch, sprinkle a little more Parmesan or a drizzle of olive oil.
- Place the filled mushrooms back onto the baking sheet. Bake at 190°C (375°F) for 15-20 minutes, until the tops are golden and crispy. Keep an eye on the breadcrumbs—they should be toasted but not burnt.
- Once out of the oven, let the mushrooms rest for 5 minutes. This allows the filling to set slightly. Serve warm, garnished with fresh herbs or a squeeze of lemon if desired.
Let the mushrooms rest for 5 minutes on the baking sheet. Serve them warm, garnished with fresh herbs or a squeeze of lemon to brighten the flavors. They should be tender, with a crispy topping and a flavorful filling.
How to Know It’s Done
- Breadcrumbs are golden and crispy on top.
- Mushroom filling is bubbling and set, not runny.
- Mushroom caps are tender but hold their shape when gently tested.
Baked Stuffed Mushrooms with Crispy Breadcrumbs
Ingredients
Equipment
Method
- Preheat your oven to 375°F (190°C). Line a baking sheet with parchment paper for easy cleanup.
- Gently clean the mushroom caps with a damp cloth and carefully remove the stems, setting them aside for the filling. Brush the caps lightly with olive oil and place them gill side up on the prepared baking sheet.
- Bake the mushroom caps for about 10 minutes until they soften slightly and release a lovely earthy aroma. This pre-cooking step helps prevent sogginess later.
- While the mushrooms bake, finely chop the reserved stems. In a skillet over medium heat, warm a tablespoon of olive oil. Add the chopped stems and cook for 3-4 minutes until they soften and smell fragrant.
- Add the minced garlic to the skillet and cook for another minute until it becomes aromatic and golden. Remove from heat and let cool slightly.
- In a small bowl, combine the softened cream cheese, grated Parmesan, chopped parsley, thyme, and a pinch of salt and pepper. Mix until smooth and creamy.
- Stir the sautéed stems and garlic into the cheese mixture, ensuring everything is well combined. If desired, add a splash of lemon juice for brightness.
- Using a spoon, generously stuff each mushroom cap with the prepared filling, pressing gently to pack it in. Top each with toasted breadcrumbs, pressing lightly so they adhere.
- Place the filled mushrooms back on the baking sheet and bake for another 15-20 minutes until the tops are golden brown and crispy, and the filling is bubbling.
- Remove from the oven and let rest for 5 minutes to allow the filling to set. Serve warm, garnished with extra herbs or a squeeze of lemon if desired.
Notes
Pro tips for crispy stuffed mushrooms
- Bolded Mini-Head: Use high-quality breadcrumbs for a noticeable crunch and toasted flavor.
- Bolded Mini-Head: Finely chop garlic to evenly distribute its pungency without overwhelming bites.
- Bolded Mini-Head: Toast breadcrumbs until golden and crispy, then sprinkle immediately for best crunch.
- Bolded Mini-Head: Bake mushrooms on a hot sheet to start crisping the tops early, avoiding sogginess.
- Bolded Mini-Head: Rest stuffed mushrooms for 5 minutes to allow filling to set, preventing spills when serving.
- Bolded Mini-Head: Use a light touch when pressing breadcrumbs on top to prevent them from falling off during baking.
Common mistakes and how to fix them
- FORGOT to preheat oven → Always preheat for even cooking and crisp topping.
- DUMPED filling into mushrooms without packing → Gently press filling for a compact, tidy look.
- OVER-TORCHED breadcrumbs → Keep an eye; toast until golden, not burnt.
- MISSED resting time → Rest for 5 minutes to set filling and prevent spillage.
Quick fixes and pantry swaps
- When breadcrumbs aren’t crispy enough → Splash a little olive oil before baking for extra crunch.
- If mushrooms release too much moisture → Patch with a higher oven temperature, about 200°C (390°F).
- Dumped filling too runny → Shield with extra breadcrumbs and bake a few minutes longer.
- Overly salty filling → Rescue with a squeeze of lemon to brighten and balance flavors.
- Pantry swap: use crushed cornflakes instead of breadcrumbs for a lighter, crunchier topping with shimmer.
Prep, store, and reheat tips
- You can prepare the mushroom filling a day ahead; keep it covered in the fridge for up to 24 hours. The flavors meld nicely overnight, making assembly quicker.
- Assemble the stuffed mushrooms up to 2 hours before baking. Keep them covered in the fridge to prevent the filling from drying out or absorbing fridge odors.
- Baked leftovers will keep well in an airtight container in the fridge for 2-3 days. The topping might soften slightly, but the flavor remains rich and satisfying.
- Reheat gently in a 160°C (320°F) oven for about 10 minutes until warmed through. Expect the topping to regain some crunch if you give it a quick broil at the end, about 1-2 minutes, watching carefully to avoid burning.
Top questions about stuffed mushrooms
1. What size of mushrooms works best?
Use large, firm mushroom caps to prevent collapsing and ensure they hold the filling well.
2. How do I know when they’re done?
Bake until the tops are golden and crispy, and the filling is bubbling, about 15-20 minutes at 375°F.
3. Should I add lemon or herbs?
Add a squeeze of lemon after baking to brighten the flavors and balance the richness of the filling.
4. Can I make the filling ahead?
You can prepare the filling a day in advance; keep it refrigerated and assemble just before baking.
5. What can I use instead of traditional breadcrumbs?
Use panko breadcrumbs for a lighter crunch or Ritz crackers for extra buttery flavor on top.
6. My filling is too wet, what now?
If the filling is too runny, add more breadcrumbs or cheese to thicken it before stuffing the mushrooms.
7. Why isn’t the topping crispy?
Preheat your oven fully before baking to ensure even cooking and crisping of the topping.
8. How long do leftovers last?
Store leftovers in an airtight container in the fridge for up to 3 days. Reheat gently in the oven.
9. Can I adjust the garlic flavor?
Use freshly minced garlic for a pungent aroma, or roasted garlic for a mellow, sweet flavor.
10. My mushrooms are soggy after baking?
To fix soggy mushrooms, bake at a slightly higher temperature for a few extra minutes to crisp the topping.
These baked stuffed mushrooms aren’t just a side—they’re a little moment of crunch and umami that sticks with you. The crispy topping and savory filling make every bite feel like a small celebration, even on a hectic weeknight. It’s a dish that’s simple but memorable, perfect for when you want comfort and a touch of elegance.
In times when we crave something familiar yet a bit special, this recipe hits right. It’s honest, straightforward, and full of real flavors that don’t need fussing over. No matter if you’re feeding guests or just yourself, those crunchy tops and tender mushrooms keep calling you back—no complicated tricks, just good, honest cooking.

Hi, I’m Michael Anderson, the voice behind Overreacting To Salt. Yes, the name usually gets a laugh. And no, I am not actually afraid of salt. In fact, understanding salt and flavor balance is what inspired this entire blog.
 The voice behind Overreacting To Salt. Yes, the name usually gets a laugh. And no, I am not actually afraid of salt. In fact, understanding salt and flavor balance is what inspired this entire blog.
Overreacting To Salt is my space to talk honestly about cooking mistakes, kitchen wins, and the small details that make a big difference in flavor. I created it for home cooks who want to understand food better without feeling intimidated.
The voice behind Overreacting To Salt. Yes, the name usually gets a laugh. And no, I am not actually afraid of salt. In fact, understanding salt and flavor balance is what inspired this entire blog.
Overreacting To Salt is my space to talk honestly about cooking mistakes, kitchen wins, and the small details that make a big difference in flavor. I created it for home cooks who want to understand food better without feeling intimidated.


