There’s something about the humble potato that holds a special place in my kitchen. These baked potato wedges are a nod to childhood snack times, that perfect mix of crispy edges and soft, fluffy insides. It’s funny how such a simple thing can evoke memories of late-night cravings and lazy Sunday afternoons, yet still feel fresh with just a sprinkle of pantry staples.
I love how these wedges turn out when baked just right—crackly on the outside, tender inside, with a smoky hint from the oven that makes them irresistible. No fancy ingredients, just potatoes, a bit of oil, and a pinch of salt, but the result is surprisingly satisfying. They’re perfect for sharing, or just for sneaking a handful when no one’s looking.
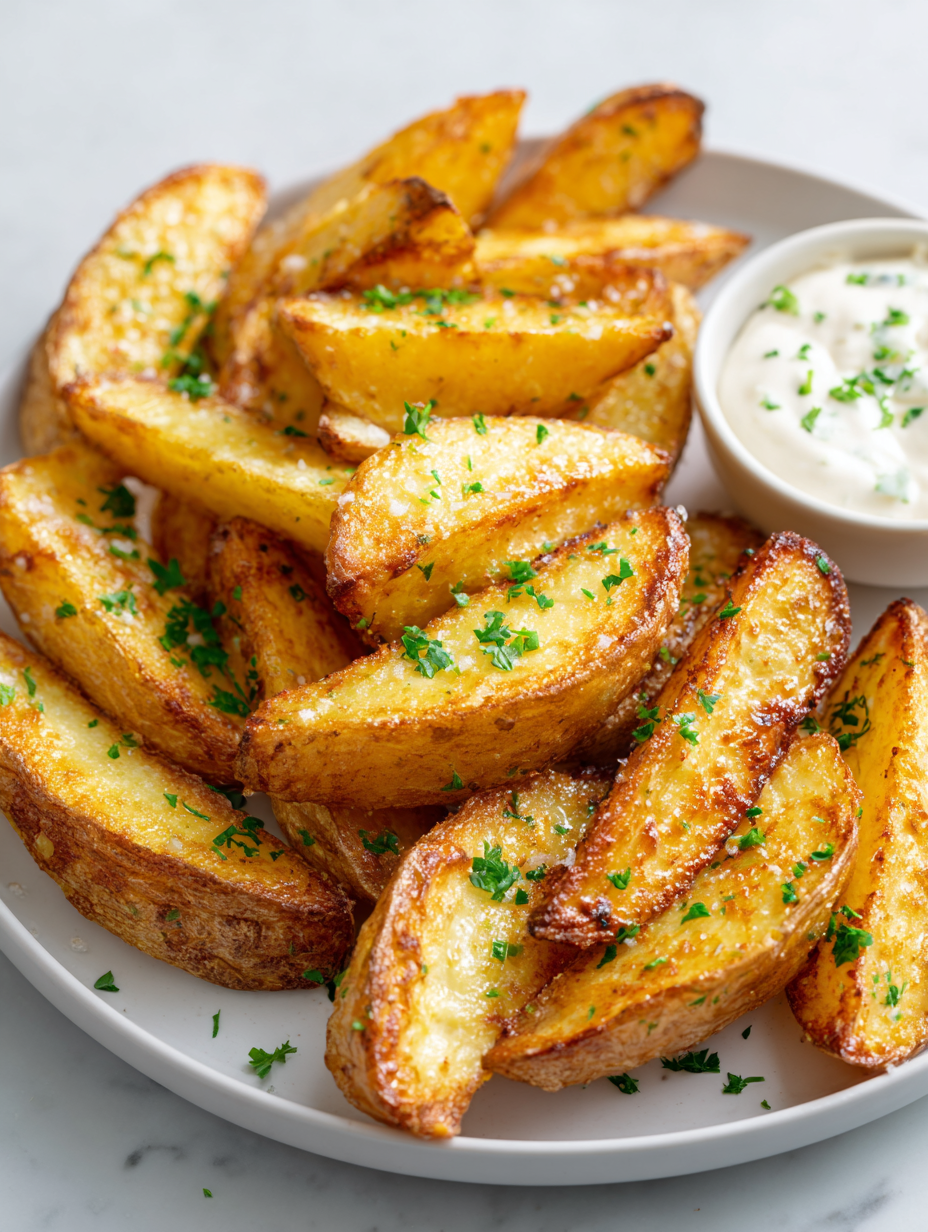
Focusing on how a simple, humble baked potato wedge can become a nostalgic comfort food with a crispy exterior and fluffy interior, reminiscent of childhood snacks and late-night cravings, yet elevated with just a few pantry staples.
The story behind this recipe
This recipe came about one rainy afternoon when I was stuck at home with a bag of potatoes and a craving for something crispy. I used to make similar wedges as a kid, but I wanted to elevate the simple snack without fuss or fancy ingredients. The idea was to get that perfect crunch on the outside while keeping the inside fluffy and warm, just like I remembered from late-night bites and cozy family dinners. Over time, I tweaked the seasoning and baking method until I got it just right—crisp, tender, and addictive enough to keep reaching back for more.
Ingredient breakdown: key components
- Russet potatoes: I like the fluffy interior these give, but Yukon Golds add a buttery richness—swap if you prefer a creamier bite.
- Olive oil: I use a good drizzle for that smoky, slightly fruity aroma. For a lighter version, try avocado oil, which keeps that lush mouthfeel.
- Salt: I always sprinkle generously—potatoes drink it up and it makes the crust sing. Sea salt flakes bring a nice crunch and shimmer.
- Black pepper: Freshly cracked pepper adds a sharp kick—skip if you want milder results or switch to smoked paprika for a smoky depth.
- Paprika or spices: I love a dash of smoked paprika for that earthy, smoky note; chili powder or garlic powder work too, depending on your mood.
- Optional herbs: Fresh thyme or rosemary can lift the flavor—add before baking for fragrant, crispy edges that make the kitchen smell amazing.
- Cornstarch (if using): A light dusting helps achieve an extra crispy exterior—skip if you prefer a softer crust or want to keep it simple.
Spotlight on key ingredients
Russet potatoes:
- I like the fluffy interior these give, but Yukon Golds add a buttery richness—swap if you prefer a creamier bite.
- Olive oil: I use a good drizzle for that smoky, slightly fruity aroma. For a lighter version, try avocado oil, which keeps that lush mouthfeel.
- Salt: I always sprinkle generously—potatoes drink it up and it makes the crust sing. Sea salt flakes bring a nice crunch and shimmer.
Spices and herbs:
- Black pepper: Freshly cracked pepper adds a sharp kick—skip if you want milder results or switch to smoked paprika for a smoky depth.
- Paprika or spices: I love a dash of smoked paprika for that earthy, smoky note; chili powder or garlic powder work too, depending on your mood.
- Optional herbs: Fresh thyme or rosemary can lift the flavor—add before baking for fragrant, crispy edges that make the kitchen smell amazing.
Notes for ingredient swaps
- Dairy-Free: Use coconut oil instead of butter for a subtle tropical aroma and a slightly different crispness.
- Gluten-Free: Ensure your spices are gluten-free; most are, but double-check for cross-contamination, especially with paprika blends.
- Low-Sodium: Opt for a salt substitute like potassium chloride; keep in mind it may have a slightly bitter aftertaste.
- Vegan: Skip butter or cream-based dips; use avocado or hummus for creamy, plant-based options that add richness.
- Extra Crispy: Add a tablespoon of cornstarch or arrowroot powder to the oil and spice mix for an ultra-crispy exterior.
- Herb Variations: Swap fresh thyme or rosemary for dried versions—use less, as dried herbs are more concentrated in flavor.
- Spice Boost: Replace smoked paprika with chipotle powder or cayenne for a fiery kick that still smokes on the tongue.
Equipment & Tools
- Baking sheet: To hold the wedges for baking and ensure even heat exposure.
- Sharp knife: For cleanly slicing potatoes into wedges.
- Mixing bowl: To toss and coat the wedges with oil and spices evenly.
- Spatula: To turn the wedges during baking without breaking them.
Step-by-step guide to baked wedges
- Gather your equipment: a sturdy baking sheet, a sharp knife, a mixing bowl, and a spatula. These will help you prep and bake evenly.
- Preheat your oven to 220°C (425°F). A hot oven ensures that crispy exterior we’re after.
- Wash and dry your potatoes thoroughly. No one likes soggy wedges, so start with dry, clean potatoes.
- Cut each potato in half lengthwise, then slice into 3-4 wedges, depending on size. Aim for uniform thickness for even baking.
- In a mixing bowl, toss the wedges with about 2 tablespoons of olive oil. Make sure each piece gets a light coat—no pools of oil!
- Sprinkle generously with sea salt, black pepper, and a pinch of smoked paprika or your favorite spice blend. Toss again to coat evenly.
- Spread the wedges out in a single layer on your prepared baking sheet. Don’t crowd them; air needs to circulate for crispiness.
- Bake for 25-30 minutes, flipping halfway through. Listen for that satisfying crackle and watch for golden edges.
- Check for doneness: the wedges should be crispy on the outside, tender inside, with a deep amber hue. If not, bake a few minutes longer.
- Remove from oven and let rest for 5 minutes. This helps the crust set and keeps them from sticking together.
- Serve hot, sprinkled with a little extra salt or herbs if desired. Perfect as a snack or side dish with your favorite dip.
Let the wedges rest for 5 minutes off the oven to firm up. Serve immediately while hot and crispy, maybe with a squeeze of lemon or a dollop of sour cream for contrast.
How to Know It’s Done
- Wedges are golden and crispy on edges, with a crackling sound when handled.
- Potatoes jiggle slightly when gently shaken, indicating internal tenderness.
- Surface looks evenly browned, not burnt or pale, with a smoky aroma filling the kitchen.
Baked Potato Wedges
Ingredients
Equipment
Method
- Start by washing and thoroughly drying the potatoes to remove any excess moisture, which helps achieve crispiness.
- Using a sharp knife, cut each potato in half lengthwise, then slice each half into 3-4 wedges, aiming for uniform thickness for even baking.
- Place the potato wedges into a large mixing bowl, then drizzle with olive oil, ensuring each piece gets a light, even coat.
- Sprinkle the wedges with sea salt, black pepper, and smoked paprika, then toss everything together with a spatula until well coated and evenly seasoned.
- Spread the seasoned wedges out in a single layer on a prepared baking sheet, making sure they are not crowded to allow air circulation for crisping.
- Bake in a preheated oven at 220°C (425°F) for 25-30 minutes, flipping the wedges halfway through to promote even browning and crispiness.
- Check the wedges around the 25-minute mark; they should be golden-brown, crispy on the edges, and tender inside. If needed, bake for a few more minutes until perfect.
- Remove the wedges from the oven and let them rest for 5 minutes; this helps the crust set and prevents them from sticking together.
- Serve the hot wedges immediately with your favorite dips or a squeeze of lemon for added brightness.
Pro tips for crispy wedges
- Use a light oil coating to maximize crispness without greasiness.
- Toss potatoes in spices and oil thoroughly for even flavor and crunch.
- Flip wedges halfway to ensure uniform browning and crispy edges.
- Bake on a hot sheet to jumpstart that initial sizzle and crackle.
- Watch for a deep golden color—edges should be crispy and slightly darker for best texture.
- Rest baked wedges for 5 minutes—this helps set the crust and keeps them from sticking together.
Common mistakes and how to fix them
- FORGOT to preheat the oven → Always preheat to ensure crispy wedges.
- DUMPED all oil at once → Use a light drizzle and toss for even coating.
- OVER-TORCHED the edges → Reduce baking time or lower temperature if edges burn.
- SKIPPED flipping the wedges → Turn halfway for uniform crispiness.
Quick fixes and pantry swaps
- When oil smokes, splash in a splash of water to calm the flames.
- If wedges stick, patch with a quick spray of non-stick spray before baking.
- DUMPED too much salt? Rinse wedges briefly and pat dry before baking again.
- Over-torched edges? Shield with foil and lower oven temp for even color.
- Splash a squeeze of lemon or a pinch of sugar if flavors fall flat or need brightening.
Prep, store, and reheat tips
- Prep the potato wedges up to a day ahead: wash, cut, and toss with oil and spices. Keep covered in the fridge to retain freshness and prevent drying out.
- Store baked wedges in an airtight container in the fridge for up to 3 days. Reheat in a hot oven (180°C/350°F) for 10-15 minutes until crispy and warm, with a slight crackle on the edges.
- For longer storage, freeze the wedges raw on a baking sheet, then transfer to a freezer bag. They’ll keep for up to 1 month. Bake directly from frozen, adding 5-7 minutes to the baking time.
- Reheated wedges may lose some crispness but will still be tender inside. To revive crunch, broil for the last 2 minutes, watching carefully for burning or over-browning.
- Flavors can deepen after a day in the fridge, so expect a slightly more concentrated, savory taste. Serve with fresh dips or a squeeze of lemon for brightness.
Top questions about baked potato wedges
1. Can I use different potatoes?
Use russet potatoes for the best fluffy interior and crispy skin. Yukon Golds can work if you prefer a richer, creamier bite.
2. Can I make these without oil?
Yes, toss the wedges lightly in oil and spices, then bake. Adjust cooking time slightly if wedges are thicker or thinner.
3. What temperature and time should I use?
Bake at 220°C (425°F) for 25-30 minutes, flipping halfway. Look for golden edges and a crispy crackle when done.
4. How do I prevent them from sticking together?
Ensure the wedges are evenly coated with oil and spices. Don’t crowd the baking sheet to allow air circulation for crispiness.
5. How do I get them extra crispy?
If wedges aren’t crispy enough, bake for a few more minutes, or broil for 1-2 minutes at the end for extra crunch.
6. How should I store leftovers?
Store leftovers in an airtight container in the fridge for up to 3 days. Reheat in a hot oven or air fryer until crispy again.
7. Any tips for prepping the wedges?
Use a sharp knife for clean cuts, and dry potatoes thoroughly before tossing with oil to ensure crisp edges.
8. Can I add herbs or spices?
You can add herbs like thyme or rosemary before baking for extra flavor. Use dried herbs if fresh aren’t available.
9. Can I freeze the wedges?
Yes, you can freeze raw wedges on a baking sheet, then transfer to a bag. Bake directly from frozen, adding a few minutes.
10. What if my wedges aren’t crispy or look uneven?
If they turn out soggy, increase oven temperature slightly or bake longer. For uneven coloring, rotate the baking sheet during cooking.
These wedges remind me of those lazy summer evenings when everything feels simple and satisfying. The crispy edges and fluffy insides bring back childhood memories of snacks and family dinners, but with a slightly elevated touch that makes them feel special. They’re the kind of side that pairs just as well with a quiet night at home as with a big, noisy gathering.
In the end, it’s about those small moments—cracking the crispy crust, inhaling that smoky aroma, and sharing a plate of something humble yet truly comforting. Sometimes, a simple recipe like this becomes a little tradition, a way to slow down and enjoy the little things. No matter the occasion, they always manage to make the table feel a little more inviting.

Hi, I’m Michael Anderson, the voice behind Overreacting To Salt. Yes, the name usually gets a laugh. And no, I am not actually afraid of salt. In fact, understanding salt and flavor balance is what inspired this entire blog.
 The voice behind Overreacting To Salt. Yes, the name usually gets a laugh. And no, I am not actually afraid of salt. In fact, understanding salt and flavor balance is what inspired this entire blog.
Overreacting To Salt is my space to talk honestly about cooking mistakes, kitchen wins, and the small details that make a big difference in flavor. I created it for home cooks who want to understand food better without feeling intimidated.
The voice behind Overreacting To Salt. Yes, the name usually gets a laugh. And no, I am not actually afraid of salt. In fact, understanding salt and flavor balance is what inspired this entire blog.
Overreacting To Salt is my space to talk honestly about cooking mistakes, kitchen wins, and the small details that make a big difference in flavor. I created it for home cooks who want to understand food better without feeling intimidated.


